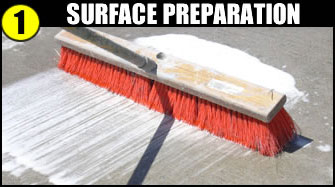
Surface Preparation
Use etch-n-clean (acid wash) to open the pores of the substrate as well as remove oil and other unwanted contaminants to provide maximum adhesion resulting in a sandpaper like finish.


Use etch-n-clean (acid wash) to open the pores of the substrate as well as remove oil and other unwanted contaminants to provide maximum adhesion resulting in a sandpaper like finish.
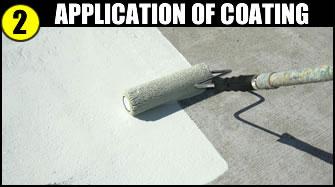
Mix both components of the base coat epoxy together thoroughly and begin “cutting in” the outside parameter. Begin rolling the epoxy base coat in six by six foot sections starting in the further most corner of the room.
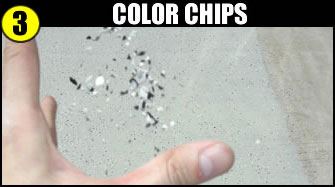
Apply by tossing a pinch-full upward toward the ceiling allowing them to float down into the wet base coat (We recommend “basketball-shooter” style dispersion). By using the pinching method you will avoid clumping and keep the dispersion even. Be sure to have enough chips for desired broadcast.
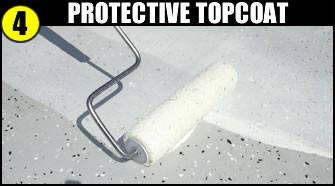
Before applying, wait overnight for the base coat the efficiently cure. Mix part A & B together of the topcoat. Roll one even coat to entire surface. Topcoat may appear milky white but will dry crystal clear. Your floor will be ready for light traffic in as little as 16 hours, heavy traffic 36 hours.
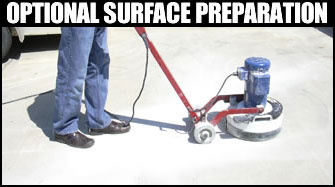
The ideal method for concrete prep whether it’s bare, new or previously coated concrete would be to use a floor grinder. Or if you’re coating concrete that has been sealed with a sealer, it is necessary to use a floor grinder to prepare the concrete. Using the grinder will open up the pores of the concrete to allow the epoxy to sink in, therefore achieving maximum adhesion.
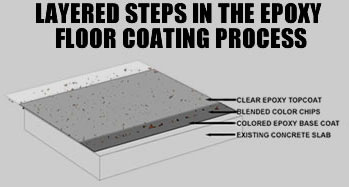
1. Existing concrete slab
2. Colored epoxy base coat
3. Blended color chips
4. Clear epoxy topcoat
All residue-traces of oil and grease and other contaminants must be removed before acid etching, grinding or shot blasting. Grinding and shot blasting will only push contamination deeper into the porous concrete surface. Use oil and grease emulsifiers to clean thoroughly. The Original Color Chips Etch 'N Clean solution will dissolve dirt, oil, and surface contaminants. Stubborn or heavy residue areas may require repeated applications.
Acid etching can be performed to open the pores of the concrete and increase the profile of the surface. See our Etching tutorial here. After etching, the floor must be rinsed thoroughly and allowed to dry. Acid etching will not work on surfaces that have been treated with sealers. The Etch 'N Clean in the Original Color Chips System is a phosphoric acid solution with a cleaning agent included, that is safe and adequate way to profile a floor. It is our choice for prepping the floor because it is the most practical and cost effective.
Muriatic Acid is a more aggressive acid that should be considered if the floor is trowelled to glass-like finish. Though much less user-friendly than our etch n' clean, Muriatic Acid can give your floor a rough, sandpaper-like profile, but it will not clean any contamination. (note: it does not have a cleaning agent so we advise using the Etch N' Clean prior to Muriatic Acid). If you wish you use the Muriatic Acid please use with caution.
Download a PDF file of etching concrete using MURIATIC ACID here. (283kb) ![]()
Methods such as Shot Blasting, Scarifying, Diamond Grinding, Grinding/Sanding, Key Cuts and Water Jetting are examples of effective means of mechanical surface preparation. Below is a brief summary of these methods with features, benefits and limitations. These examples are normally the primary choice of professional contractors:
Shot Blasting
The preferred method of mechanical preparation that strips thin coatings, cleans and profiles simultaneously. It is suitable for large and small areas. delivers high production rates, dust free, dry and cost-effective. Excess shot must be swept-up after blasting.
Scarifying
Method uses metal or carbide disks that rotate at high speeds. Levels uneven floors and edges of concrete. Removes adhesives and thick film coatings. Dusty, very slow and labor intensive.
Diamond Grinding
Diamond bits are used to grind the surface. Leaves a very smooth profile-ideal for thin film system applications. Low dust levels. Removes epoxies and urethanes. Slower than other methods.
Grinding/Sanding
Prepares, cleans and abrades existing coatings for recoat and helps smooth aggregate floors. Is slow and intensive. See some floor grinders in our online store.
Key Cuts
Masonry saw cuts/small grooves (approx. 1/4inch deep) made around drains, doors and transitions. These serve as anchor points for the epoxy system, limit sections of failure and reduce undercutting by chemicals.
Water Jetting
Water sprayed at extremely high pressure (5,000-40,000 psi) with enough force to profile concrete, remove laitance, contamination and unsound concrete. No dust is generated, tight spaces can be prepared and different profiles can be achieved. Eliminates need for harsh chemicals. Sufficient water source must be available, time required for thorough dry.
PATCHING: Filling in divots, pits and cracks is an optional step. Hairline cracks will be filled in with base coat epoxy and do not require special attention unless the crack is wide or deep. Patch all pits and cracks by utilizing a concrete patching compound. Please allow the patching compound to sufficiently cure prior to etching. EXPANSION JOINTS: Use a self-leveling sealant (flexible coating) if you wish to fill in expansion joints, etc (optional). Fillers must dry overnight before etching as well. It is extremely difficult to completely hide an expansion joint, therefore it is recommended to fill it in as much as you can with a self-leveling sealant. The expansion joints allow the concrete to move without cracking it.
Epoxy Systems are two-component catalyzed systems that demand strict adherence to all technical data and guidelines. Below is a routing checklist of sound practices and procedures:
• Before beginning, review all project specifications closely and read all technical data thoroughly.
• Stage all materials before starting and double check that all the proper products, components and quantities are on hand.
• Carefully follow all mixing instructions-observe all mixing ratios, rates and order of addition- i.e., Component B is added to Component A.
• Provide efficient and thorough mixing of all products and allow for proper "sweat-in" or induction time.
• Only mix enough material to be applied within the recommended working time or pot-life of the product.
• Measure temperatures and make they are within allowable application ranges and note where cold temperatures will slow curing times and hot temperatures accelerate performance/application parameters.
• If using thinners-only use recommended thinning agents. Water can be used to thin waterborne epoxy. (ideal when using as a primer coat). Xylol Xylene can be used to thin solvent based epoxy and urethanes.
• Once the coatings are prepared, make sure the recommended application tools employed are high quality, clean and in good working condition.
• The Original Color Chips Waterborne Basecoat and Clearcoat is a waterborne epoxy and safe to use anywhere (think latex paint). The odor is minimal and non-toxic.
• The Original Color Chips High Performance Urethane is a solvent based material therefore a flammable liquid. THIS MUST ONLY BE USED WITH ADEQUATE VENTILATION. With ANY urethane, you want to prevent a build-up of vapors by opening all windows and doors to achieve cross-ventilation. Keep away from heat, sparks and flame. Do not smoke around for vapors may ignite. Extinguish all heaters and pilot lights and disconnect all electrical motors and appliances before use and until all vapors are gone.
Waterborne Epoxy is easiest to install mostly because it's safe to use anywhere. Low odor, no flammability and excellent adhesion combined with a long lasting finish is why waterborne epoxy dominates the do-it-yourself market. The original color chips waterborne epoxy has a much higher solids count (45%) than average waterborne epoxy. It is a two component high gloss system forrmulated for excellent impact and abrasion resistance. Withstands strong solvents and cleaning compounds. Compatible with high performance topcoats; urethanes, or 100% solids. Waterborne Epoxy has Low VOC, Low odor, Good acid and chemical resistance, Excellent adhesion, Resists strong cleaning compounds, and suitable for a variety of Interior applications such as wood, masonry, steel, and tile. Our standard kits you see in our webstore consist of waterborne epoxy base coat and a waterborne epoxy clear coat. However, you can upgrade to our High Performance Urethane Clearcoat for maximum chemical resistance and UV-resistance.
Solventborne epoxy has much higher solids counts (thicker build) and has greater durability and longevity than waterborne epoxy but doesn't have as large of a coverage area per gallon. Therefore, solvent based material is a little more costly (it's considered a hazardous material according the department of transportation therefore shipping rates can be increased). Solventborne material isn't very difficult to apply. I can be roller applied or squeegee applied. Due to it's thickness it's recommended to use a mechanical mixer (aka jiffy mixer) to properly mix the two components. We do stock several types of Solventborne Epoxy, if your job requires a solvent based high build system, use our quote form.
100% solids epoxy floor coating is designed for use as a protective coating, resurfacing, and/or for patching surfaces exposed to severe and aggressive industrial environments. Advanced technology has provided us with a tough coating for high abuse areas and also an attractive finish that is easy to maintain. This film offers greater compressive strength than concrete and contains no solvent to cause shrinkage and fire hazard during application. 100% solids are solvent free — No VOCs, Low odor, Non-flammable, Excellent abrasion resistance, Excellent color retention, provides no shrinkage, Self-leveling (has the appearance of glass when finished,and designed for squeegee, roller, brush, hand broadcast, or trowel application. It does require a primer coat to prevent outgassing and blistering (waterborne epoxy is a preferred primercoat). The coverage on 100% solids epoxy is about 100 to 150 sq/ft per gallon therefore is the most costly floor system. We do stock 100% solids epoxy so If your job requires a solvent based high build system, such as a full broadcast color chip appearance,use our quote form.
Though often applied by trained professional contractors with utilization of specialized equipment, application tools and techniques, many can be applied simply by those not in the industry. Application tools and techniques vary depending on the type of flooring systems. If you have any special application questions, use our quote form.