We offer several different types of coatings systems depending on your application. Customer satisfaction is our number one priority. So if you need any questions answered or need help with this site just contact us at 1-800-227-8479 and we will help you in anyway that we can. Please allow 24 - 48 hours for a response for we have quite a bit of traffic.

We hope you enjoy the ease of ordering your floor coatings and supplies here on-line. The best part is that Original Color Chips on-line shop is open 24/7, so you can place your order at any time, day or night!
Visit our helpful hints page or our Frequently Asked Questions page to learn more about the different systems and options.
Epoxy Floor Coating Preparation & Application Steps
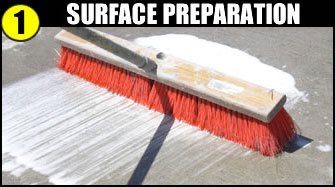
Surface Preparation
Use etch-n-clean (acid wash) to open the pores of the substrate as well as remove oil and other unwanted contaminants to provide maximum adhesion resulting in a sandpaper like finish.
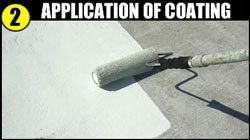
Application of Base Coat
Mix both components of the basecoat epoxy together thoroughly and begin “cutting in” the outside parameter. Begin rolling the epoxy basecoat in six by six foot sections starting in the further most corner of the room.
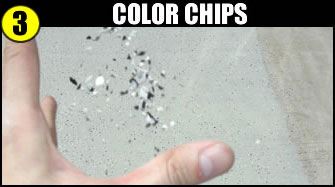
Application of Color Chips
Apply by tossing a pinch-full upward toward the ceiling allowing them to float down into the wet basecoat (We recommend “basketball-shooter” style dispersion). By using the pinching method you will avoid clumping and keep the dispersion even. Be sure to have enough chips for desired broadcast.
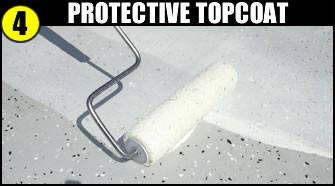
Application of Protective Topcoat
Before applying, wait overnight for the basecoat the efficiently cure. Mix part A & B together of the topcoat. Roll one even coat to entire surface. Topcoat may appear milky white but will dry crystal clear. Your floor will be ready for light traffic in as little as 16 hours, heavy traffic 36 hours.
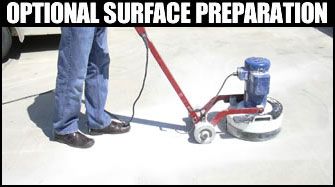
Optional Surface Preparation
The ideal method for concrete prep whether it’s bare, new or previously coated concrete would be to use a floor grinder. Or if you’re coating concrete that has been sealed with a sealer, it is necessary to use a floor grinder to prepare the concrete. Using the grinder will open up the pores of the concrete to allow the epoxy to sink in, therefore achieving maximum adhesion.
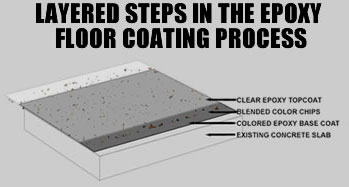
Layered Steps in the Epoxy Floor Coating Process
1. Existing concrete slab 2. Colored epoxy basecoat 3. Blended color chips 4. Clear epoxy topcoat
Check Out our Frequently Asked Questions, Flooring 101 and Flooring Instructions
If you have any questions about our products you can visit our contact us page! You will find the link on the left hand column of this page. This page contains our phone and fax numbers along with our mailing address, also from this page you can email us directly buy filling out the form and clicking the send button.
Also if you have any questions about how to use this site or have any trouble gaining access to certain pages of this site or even just have suggestions on how to improve this site for future customers please contact the Webmaster at webmaster(at)originalcolorchips dot com. Again, Our goal is 100% customer satisfaction!
Hey Canada!!! You can figure your shipping by using our shipping estimator (at checkout) and choosing your country. All water-based & solventborne products can be shipped to Canada (WB basecoat, WB clearcoat, chips, etc.) However, UPS will charge a brokerage fee for the customs clearance. The fee varies depending upon the dollar amount. A breakdown of the fees can be found here for UPS and here for FedEx.
QUANTITY PRICE BREAK WHEN PURCHASING MULTIPLE QUANTITIES OF CHIPS!
Purchase between 6 or more of the same color or blend and get 15% off, 12 or more and get 30% off, 24 or more of the same blend and get 50% off the price! The discount will be applied at checkout. This applies to chips only!


